This is the ultimate guide to warehouse setup.
In this article, you’ll learn:
- What’s all involved in the warehouse planning and design process
- Different warehouse layouts and how to choose the best one for you
- How to create a warehouse drawing
- How to plan your traffic and workflows
- And lots more!
Let’s get started!
What Is the Warehouse Setup Process?
The warehouse design process involves strategically planning a facility layout to properly utilize the available space, facilitate operations, and increase efficiency.
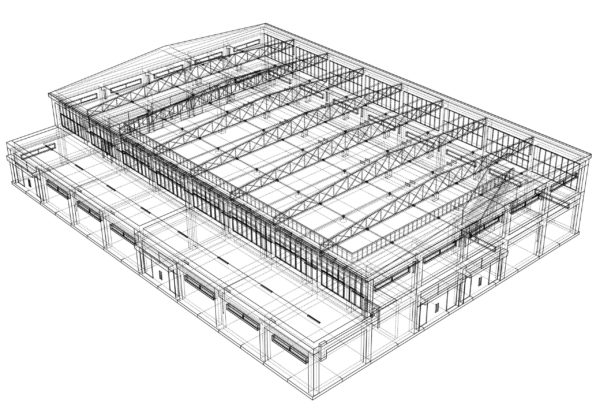
There are many aspects to warehouse design, which we’ll cover below.
What Must You Consider When Designing a Warehouse?
To set up a warehouse, you must consider certain important information:
-
The physical layout of your warehouse
-
The capacities and dimensions of all storage areas/racks
-
The types of products or goods you stock and their characteristics (this includes dimensions, weight, special environmental needs, units of measure, etc.)
-
Whether you’ll group items based on dimensions, similarities, or units of measure
What Must Be Included In a Warehouse Layout?
The warehouse design process is always different, depending on your needs and resources.
That said, the general warehouse design layout must encompass the following:
-
Making the most of the available space to maximize storage capacity
-
Reducing touchpoints to a minimum when handling goods
-
Providing easy access to stored materials and products
-
Controlling the amounts of goods and materials stored
-
Giving the highest possible rotation ratio
-
Offering maximum flexibility in product positioning
-
Improving order fulfillment rates
Overall, the goal is to make sure that you can move as much product as possible, as fast as possible, as efficiently as possible, and with limited expenses within the space available.
What Factors Go Into Warehouse Design?
Planning and setting up a warehouse is complex because of the various factors and considerations involved.
These are:
Available Space
This is the most obvious one, as it’s your biggest constraint.
The goal of your warehouse design is to use your available space effectively.
This can help you boost inventory visibility, reduce picking times, and improve your overall efficiency.
Order Fulfillment Method
Depending on how you’re fulfilling orders, the method impacts your warehouse design, especially inventory management.
We’ll cover order fulfillment methods in more detail in Step 3: Plan Your Traffic and Workflows.
Aisle Layouts
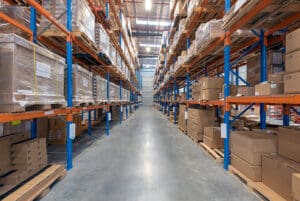
Aisle layouts must give enough space to allow workers and equipment to move quickly and safely between picking aisles.
Workflows
How your workers interact with your products has a significant impact on your warehouse design.
A good warehouse design involves mapping out workflows and finding ways to improve them.
Storage
How will you store your items or materials?
Ensuring workers have easy access to all products in the facility is vital to making operations convenient and efficient.
Throughput
This refers to the number of products/materials processed and moved through various warehouse processes such as receiving, storage, putaway, picking, packing, and shipping.
Equipment
Warehouses have a variety of equipment.
This can include picking equipment, forklifts, or even manufacturing machines.

So, a warehouse layout must make space for them to ensure they function properly and safely.
Inventory Management
You’ll need to know which items move the most.
That way, you can give them prominent positions in your warehouse.
Authority Guidelines
The warehouse design should comply with and abide by the guidelines provided by local authorities.
This can help ensure the safety of your workers, machine operators, equipment, and other valuable assets.
It’ll also help you avoid fines and legal problems.
What Does it Cost to Build a Warehouse?
The average warehouse setup cost is $20 per square foot.
But prices can range depending on the size.
For example, a small 1,200 sq. ft. warehouse can cost $24,000, while 50,000 sq. ft. can cost up to $800,000.
It’s important to compare prices from competing sources to get the best price.
Step 1: Draw Your Warehouse Layout
What is the first step in designing a warehouse?
Creating a drawing of it.
This will consist of the basic elements of your warehouse as it currently is.
Doing so will give you a basic context to work with for the next steps.
How to Create Your Warehouse Layout
There are two methods for creating a warehouse layout:
- Pencil and paper drawing
- Computer-aided warehouse layout design software
The first method is self-explanatory.
Just grab a pencil and grid paper and get started!
For the second method, you can use warehouse layout design software.
Some popular systems include:
SmartDraw
This is a paid diagram software tool that gives you different templates as a starting point.
You can drag and drop different elements within the grid to customize your warehouse design.
AutoCAD
This is a paid computer-aided design software with several warehouse layout templates that you can choose from.
SketchUp
This is a paid program that allows you to draw in three dimensions.
AnyLogic
This is a free warehouse simulation software that can also help with warehouse optimization.
ConceptDraw
This is free software that you can use to develop plant or warehouse layouts and designs.
Cadlogic
Cadlogic’s Draft it Free is a free computer-aided design (CAD) software that can help you mock up your warehouse layout.
WarehouseBlueprint
If you want particular 3D mock-ups to visualize your warehouse design, WarehouseBlueprint will give you the features you need.
Visit WarehouseBlueprint’s Website
If you don’t want to do the drawing yourself, you can hire a warehouse design expert.
They’ll create an optimized layout based on your needs and specifications.
Types of Warehouse Layouts
Before you start drawing, it’s useful to be aware of the different types of warehouse layouts.
That way, you can start thinking of the best one to suit your needs.
If you’re wondering: “What are some warehouse layout examples?” the answer is that there are 2 types overall:
- U-shaped
- Through flow
Let’s briefly cover each one.
U-Shaped Warehouse Layout
What Is It?
This is the most common type of warehouse layout.
This design is configured so that the shipping and receiving docks are next to each other and storage is located in the middle of the warehouse.
In a U-shaped design, products move along a half-circle lane from receiving to shipping.
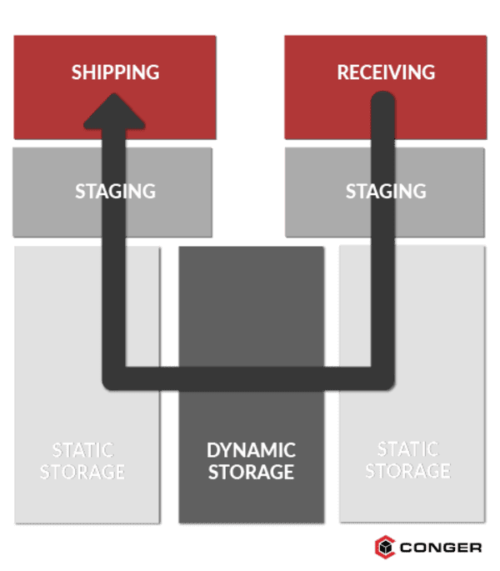
Fast-moving products move in the inside lane.
And slow-moving products move in the outside lane.
This setup allows for greater efficiency, as products can also be moved to the central storage area.
That way, they’re kept separate until employees can focus on them.
Who Is it Best For?
-
Large or small businesses
-
Businesses that expect their inventory to balloon in the future
-
Businesses that need to keep labor costs low
What Are the Pros?
-
Maximizes space
-
Minimizes product handling
-
Allows for sharing of personnel and equipment
-
Reduces bottlenecks by using two different lanes – one for fast-moving products and one for slow-moving products
-
Keeps employees separate, eliminating interference from one another
What Are the Cons?
-
Limits docking to one truck at a time
-
Can create bottleneck points when product is moved directly from receiving to shipping
Through Flow Warehouse Layouts
What Is It?
Through flow warehouse layouts can take two slightly different forms:
- I-shaped
- L-shaped
Both I-shaped and L-shaped designs are where the shipping and receiving docks are on opposite sides of the building.
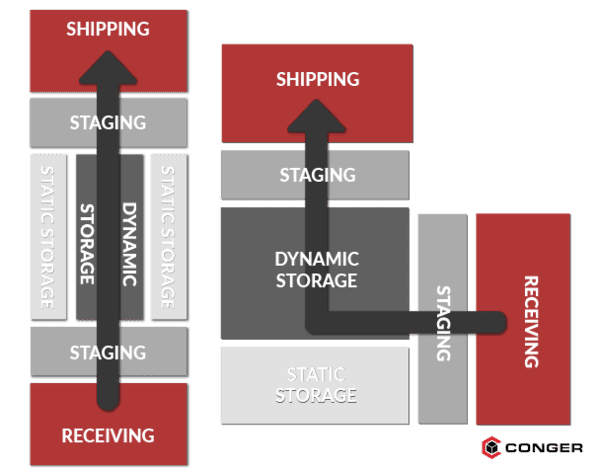
In either configuration, fast-moving inventory can go directly from receiving to shipping.
And slow-moving products can go into storage areas on either side of the lane.
Who Is it Best For?
-
Businesses that work with large inventories
-
Businesses with frequently shifting products
-
Businesses that have a large warehouse space
What Are the Pros?
-
Allows for more sorting and storage areas
-
Allows for easier monitoring of operations in each area
-
Move more products and materials with two slow lanes
-
Minimize bottlenecks by moving product in a straight line
-
Accommodate more delivery trucks with multiple dock bays
What Are the Cons?
-
More expensive than a U-shaped layout
-
Requires more space than a U-shaped layout
-
Employees have to cover more distance since inventory is located farther from the docks than in a U-shaped design
-
More access points require more security to monitor operations
Overall, you’ll need to consider the product velocity, labor resources, and budget you have to work with to decide on the best warehouse layout for your operations.
Next: Measure Your Warehouse Workspace
Once you’ve decided on your ideal warehouse layout, you’ll next need to measure your space.
You can do this manually.

Or, you can get the blueprint for your warehouse and use that.
Alternatively, if you don’t want to do it yourself, you can give it to a warehouse design expert.
Areas to Include in Your Warehouse Drawing
Once you’ve got your measurements, what else should be included in your drawing?
The following areas/parts of a warehouse must be defined when considering warehouse layout ideas:
Stationary Elements
Start by noting your stationary elements.
These can include columns, stairways, mezzanines, equipment, and overhead doors.
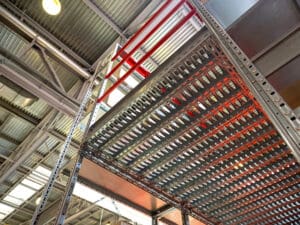
Also, make sure to note any areas that’ll need to be reserved, like loading areas, packing areas, and offices.
And make sure to record how doors open into each space to avoid blocking access or passage of goods.
Offices
Offices control the warehouse administration.
They should be located strategically to give visibility and access to all other areas within the warehouse.
Shipping and Receiving
These are areas where transportation/distribution trucks and vehicles pack for loading/unloading.
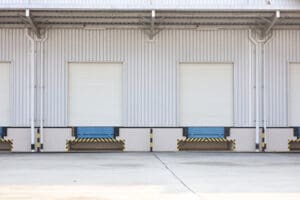
This area can be independent of or integrated into the warehouse.
Reception
Your reception areas should be independent of the rest of your warehouse.
This is important for keeping received goods separate, as well as for quality control.
Aisles
How wide should your warehouse aisles be?
The type of equipment you’ll use in the warehouse will determine this.
For example, if using forklifts, their size and turning radius will dictate the width of your aisles.
Storage
This is the area designated strictly for storing goods.
You may have multiple ways to store your goods, depending on the nature of your products and materials.
We’ll cover storage methods in more detail in Step 4: Consider Storage.
Assembly

This area is only required when your outgoing goods are of a different composition or configuration from your incoming goods.
In other words, if you have to assemble multiple components to produce your outgoing products, you’ll need an assembly area.
Dispatch
This area is used for packing orders prepared in the above areas.
It may not be a discrete area in every warehouse, as you can also do this in your loading/unloading area.
Support
You must set aside part of the warehouse to support activities at the facility.
This includes things like:
- Changing rooms
- Bathrooms
- General and management offices
- Battery charging area for forklifts
Step 2: Get Clear on What You Need
The second step in the warehouse setup process is to get clear on what you need the warehouse space for.
Here are some considerations to help you decide.
What Will You Use Your Warehouse For?
Will you use your warehouse for:
-
Manufacturing?
-
Assembly?
-
Warehousing/distribution?
Depending on what your business is, your warehouse layout will need to be different.
For example, a fulfillment warehouse likely won’t need assembly workspaces.
Conversely, a manufacturing warehouse will need extra space for picking, assembly, and packing.
What Elements Are Most Important to Your Operations And/Or Take up the Most Space?
The answer to this will be your “key elements.”
Some key elements include:
- Pallet racking and shelves
- Workspaces for packing or assembly
- Manufacturing equipment
For example, if you’re an eCommerce company that stocks and ships goods, your “key elements” would be metal shelving and pallet racks.
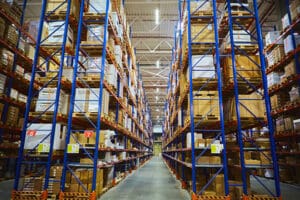
For instance, you’ll need space around workspaces, equipment, and aisles for employees to work and material handling equipment to pass.
What Materials And/Or Products Will You Handle?
You’ll need to know specs like weights, dimensions, special storage requirements, and much more.
This will not only help you consider your storage requirements.
But it will also help you get clear on the types of material handling equipment you’ll use and how that will impact your warehouse layout.
What Will Your Product Flows Look Like?
Your warehouse product flow defines your overall efficiency, productivity, and efficiency.
We’ve discussed the types of warehouse layouts previously.
And these layouts can help define your product flows.
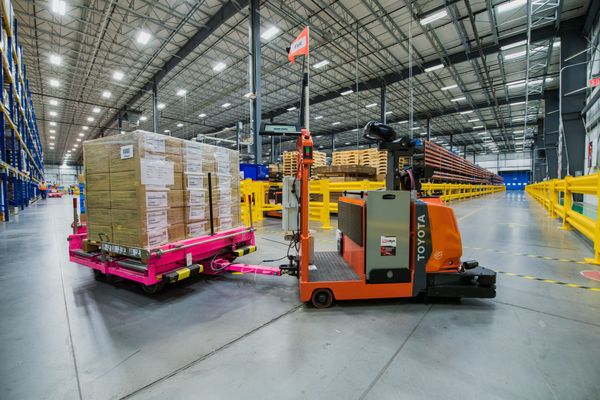
Consider each layout design and what will be best for how your materials move throughout the space.
For instance, here are some questions to consider:
-
Do you have fast- and slow-moving products?
-
Do you have multiple delivery trucks arriving at once?
-
Is consolidating worker activities to save labor your priority? For example, having shipping and receiving next to each other to allow sharing of personnel?
By answering these questions, you’ll have a better idea of how your product flows naturally.
Step 3: Plan Your Traffic and Workflows
So far, you’ve planned your key elements like equipment, assembly stations, and stock shelving.
Your next step is to plan your workflow areas and warehouse production zones.
To do so, you’ll need to be clear about how your workers, materials, and equipment move around.
Why Is Planning Your Traffic and Workflows Important?
Here’s the logic:
Products /items stay temporarily inside a warehouse, and everything that enters the facility must exit.
Workers and equipment move the products around for receiving, storage, or shipping.

The more carefully you plan your traffic and workflows, the more efficient your operation
And the more movements workers and materials make, the more time (and money) it takes to fulfill tasks.
In fact, picking operations account for more than 60% of total warehouse costs – the single largest cost factor.
So, the key is to plan your workflows to minimize movements and make your operations easier, safer, and more cost-effective.
Key Workflows Areas to Plan
The following are the most important areas to plan for an efficient warehouse layout for workflow.
Shipping and Receiving Areas
Ideally, shipping and receiving should be separate (as in, not the same dock for both).
Why?
Keeping them separate prevents bottlenecks, reduces chances of errors, and ultimately helps get products into the facility or out the door faster.
The warehouse should also have a separate “reception” area to check incoming goods for accuracy and damage.
Additionally, pallets can be broken down (if necessary) in the reception area and goods can be distributed where they need to go in the warehouse.
Work Areas
This is where the actual work is done in the warehouse.
You’ll want to spend enough time defining your work areas to achieve the most effective workflow.
At the same time, the workflow will need to ensure that employees and equipment have enough space to work safely and comfortably.
However, there aren’t any one-size-fits-all rules on what is considered adequate space.
One way to define it in your own space is by referring to OSHA’s general guidelines and warehousing safety guide.
Another way is to check your equipment manuals for guidelines on safe operating distance and practices.
Support Areas
In a warehouse, support areas include:
- Offices
- Bathrooms
- Locker rooms
- Changing rooms
- Maintenance closets
- Equipment stations (like forklift battery changing rooms)
Likely, you won’t be able to change the locations of these areas.
So, you’ll have to design your workflows around them.

The offices, for example, need to give your staff ample working space away from the warehouse floor.
But its location also needs to give them easy access and visibility of the ongoing work in the warehouse.
Storage and Picking Areas
For a smooth, efficient, and accurate process, warehouse picking requires the right layout design and warehouse setup.
As you think about how to design a picking workflow, consider things like:
-
Where and how will you store your items and materials?
-
How will you pick them?
-
How will you generate and assign picking lists?
-
How far will the workers walk to pick items?
-
How will the workers know where products/items are located?
To help you further in making your decision, we’ll cover some popular picking strategies below.
Types of Picking Strategies
Since each warehouse is different, you must choose a picking strategy based on the products, layout, and equipment in the facility.
The four types of picking strategies include:
Pick to Order Picking
Also referred to as individual/piece or discrete picking, pick to order picking is when a picker goes through one order item at a time before moving onto the next order.
This picking method is best suited for businesses with low order volume or those with large/heavy products.
Batch Picking
Batch picking (also called multi-order picking) involves preparing multiple orders at the same time.
In this method, workers move through the warehouse collecting products/items for multiple clients or production needs in a single trip.
Since 50% of picking time is spent on travel, batch picking can help reduce multiple returns to different storage areas.
Overall, it’s best suited for large warehouses that fill multiple orders.
Zone Picking
Zone picking is when a warehouse is divided into different areas (zones).
The facility/products can be divided based on demands (seasonal), product descriptions, or other criteria.
Workers are assigned specific zones, each in charge of picking items from that area.
Overall, zone picking can help reduce picker congestion, especially in high-order volume environments.
Zone picking is best for warehouses with a diverse inventory.
In addition, zone picking works best when the warehouse has an automation system in place to divide the facility into sections.
Wave Picking
Wave picking is a strategy that combines zone and batch picking options.
How?
In wave picking, workers move through the entire warehouse – end-to-end – and in different zones picking multiple items.
Workers can use mobile devices and barcode scanners to sort through the products/items picked from the shelves.
They later organize the products picked for individual purposes or orders.
Besides maximizing product overlap and reducing wasted time, wave picking helps balance shipping schedules, picklist capacities, and worker shifts.
To use wave picking, warehouses need enough space to set aside a large area for order preparation.
Which Picking Method Is Best For You?
Your choice of order picking method is determined by many factors, including:
-
The quantity of products/items you work with
-
Your order velocity
-
The size of your warehouse
-
The number of order pickers you have
-
How large your picking orders are
So there’s no single right answer, unfortunately.
But whichever method you choose, keep in mind that it’s best to consider using equipment to deliver materials to workers instead of them having to retrieve them physically.

These pieces of equipment may include:
- Conveyors
- Carts and pallet jacks
- Rolling staircases
By leveraging equipment, you can cut down on movement and maximize labor – regardless of the picking method you use.
Other Considerations When Planning Your Traffic and Workflows
We’ve already covered a lot of ground on planning your workflows.
But there are even more factors that are important to consider in the process.
Here are some:
How Much Time Will Your Workers Spend and Where Will They Spend It?
Will your employees spend the most time picking, assembling, or packing?
Also, what items/materials do you or workers need close by to complete tasks?
If you already have a warehouse and you have a warehouse management system (WMS) and inventory management system in place, review it for clues to your current workflows.

Are there tasks that take longer than they should?
Ask how you can change the workflow to make the task more efficient.
You can also use The Pareto Principle to help you solve this problem.
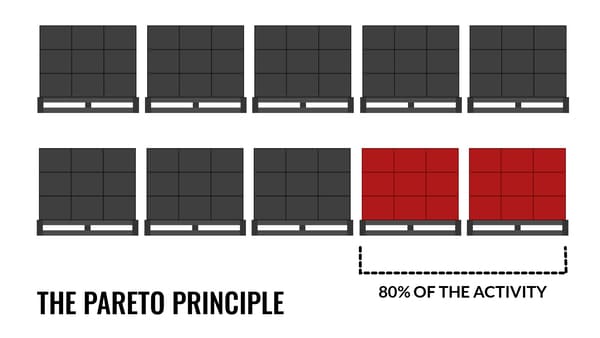
According to the Pareto Principle, 80% of the activity in a warehouse comes from 20% of the items.
And these items are the fast-movers within the warehouse.
Using the Pareto principle, you can determine your stock-keeping unit (SKU) or material locations.
How?
You can do this by:
- Sorting your SKUs into different product categories
- Classifying each product category according to related activities, such as the number of picks or shipments at a time
- Establishing how quickly each SKU is moved
- Allocating warehouse space based on how SKUs move. For example, you can allocate your highest turn SKUs together in one easily accessible location, like near the shipping doors
Minimize Cross-Traffic as Much as Possible
Minimizing cross-traffic helps reduce the chances of workers and equipment coming into contact.
You can do this by marking different paths for workers and equipment to follow from one area to another.
You’ll want to ensure these paths don’t cross over each other.
Because when they do, that’s a potential area for impact.
So ensure you mark and give a signal/sign for potential impact.
Consider Warehouse Automation
Warehouse automation involves using automatic systems to replace manual labor.
It can help you eliminate labor-intensive and time-consuming duties.

This can free up workers to focus on more value-added tasks, such as quality control.
And it can help reduce labor costs – a major part of warehouse budgets.
Step 4: Consider Storage
Storage is often the largest part of warehousing operations.
So you’ll need to carefully consider your storage needs and choose the best storage types.
To determine your storage space needs and the shelving/storage units you’ll use, first consider what you’re storing – your products/items.
Depending on the answer to that, the best storage infrastructure can take many forms.
So we’ll cover the most common types of warehouse storage below.
Types of Warehouse Storage
There are many warehouse shelving ideas you can consider.
Here are 5 most common ones:
Floor Stacking
What Is It?
Floor stacking is where two or three pallets are placed on top of one another, on the floor, and organized in rows.
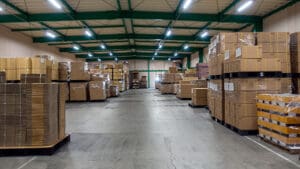
It changes in each warehouse, and the rows can only be as deep as the space allows.
But the common space (sizes) of floor stacking to allow in your warehouse layout is 4-feet deep by 8-feet long per unit.
Who Is it Best For?
Floor stacking is typically best for a LIFO (Last In, First Out) system.
This is where newly-delivered products are placed on top of the stack and get used first.
Generally, LIFO works well for non-perishable products and other inventory that aren’t time-sensitive.
What Are the Pros?
-
No racking system costs
-
Opportunity for high storage density
What Are the Cons?
-
Vertical warehouse space is underutilized
-
Limited-to-no access/visibility to individual pallets/products
-
Higher risk of product/material damage from pests, impacts, or moisture
-
High space consumption
Boxes and Bins
What Is It?
This is a simple storage method using metal storage boxes, heavyweight plastic storage boxes, assembly bins, barrels, and hoppers.
Often, warehouses will move the boxes and bins on pallets using small, manual pallet jacks.
But, some hoppers and bins are wheeled, allowing them to move without equipment.
Wondering how much boxes and bins cost?
Expect to pay around $100 to $200.
But you can save up to 50% if you buy them in bulk.
Assembly bins are much cheaper and can cost as low as $1 to $10 each, depending on the size and material.
Who Is it Best For?
These handy, stackable assembly bins are ideal for storing small items, including parts for assembly, materials for manufacturing, and small goods meant for packing and shipping.
They are commonly found in assembly and manufacturing operations.
What Are the Pros?
-
Easy to access
-
Easy to move around
-
Available in various sizes and materials
-
Capable of holding heavy items
What Are the Cons?
-
If you buy too many, they might fill your warehouse
-
Best for loose parts and materials storage – not larger items
Light-Duty Shelving
What Is It?
Light-duty (LD) shelving are storage warehouse racks made of steel frames with racks.
Sizes of LD shelving racks vary, although 18 inches to 2 feet deep by 4 feet long is the most common size.
When installing light-duty shelves, you should reinforce them or secure them against a wall to protect your products.
Depending on the size and height, you can buy light-duty shelves for between $40 and $100 per shelving unit.
Who Is it Best For?
Light-duty shelving is best for lightweight storage needs and is commonly used in small retail storerooms and garages.
But, sometimes, they’re used in warehouses for small storage needs or small warehouse spaces and storage units.
What Are the Pros?
-
Cheap and easily accessible
-
Available in different sizes
-
Come with adjustable shelves
-
Adjustable shelves mean you can store items with different dimensions
What Are the Cons?
-
Need to be supported and secured from falling
-
Don’t utilize vertical heights well because most of them are only 6 to 7 feet high
Heavy-Duty Shelving
What Is It?
Mostly used to store heavy load-bearing goods/products, heavy-duty shelving is a fully assembled warehouse rack structure composed of beams and column pieces.
They are sometimes called pallet rack’s baby brother.
But they carry less weight than pallet racking.
The sizes of heavy-duty shelving units often vary between 3 to 4 feet and to 6 to 8 feet long and between 6 and 8 feet high.
For safety, it’s important to comply with weight stipulations assigned by the manufacturer.
Heavy-duty shelving units cost from $75 to $200, depending on the size.
But you can save money if you buy in bulk.
Who Is it Best For?
Heavy-duty shelving is best for warehouses that don’t need to store as much weight as would require pallet racking.
What Are the Pros?
-
Cheap and easily accessible
-
Available in different sizes
-
Come with adjustable shelves
-
Adjustable shelves mean you can store items with different dimensions
What Are the Cons?
-
Need to be supported and secured from falling
-
Don’t make good use of vertical space
Pallet Racking
What Is It?
Pallet racking is the most popular storage method in warehouses.
This storage method leverages vertical space to store pallets of products/goods – whether palletized loads or single items.
Pallet racks are made of several components, including steel upright frames, horizontal beams, baseplates (decks), braces, adjustable crossbars (rails), and clips.

There are many types of pallet racking, including:
- Double or triple depth racks
- Drive-in/drive-through
- Push back
- Cantilever
- Pallet flow
Their costs also vary depending on the size and how much racking you intend to use.
You can pay between $120 to $350 a set for new pallet racking.
Who Is it Best For?
Pallet racks are best for both middle to heavyweight storage needs such as finished goods, boxed stock, and work materials.
What Are the Pros?
-
Maximizes space utilization. Pallet racks are best for taking advantage of vertical space in the facility
-
Allows you to store more materials and products without expanding the horizontal footprint
-
Saves money by lowering the cost per order
-
Helps prevent product damage on the ground from pests, impacts, moisture, etc.
-
Allows easy access and quick retrieval pallets
What Are the Cons?
-
While they’re built to handle medium/heavy loads, the strength of pallet racks has its limits
-
Most expensive type of storage
Key Considerations When Planning Your Storage
There are some important considerations you need to give your storage and warehouse racking setup during installation.
These are:
Have the Right Equipment
What you store will determine how you work around it.
For example, retrieving pallets from pallet racking requires a forklift.
Thus, you’ll need to plan your aisle spaces around forklift clearances.
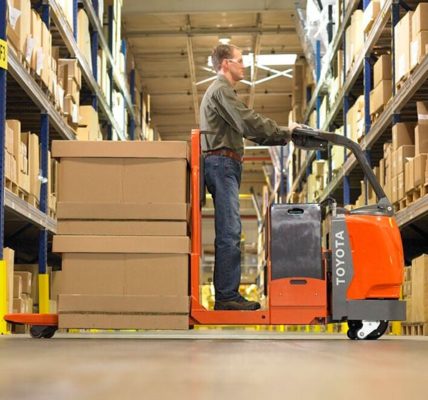
You can check with your dealer or equipment owner’s manual for specifics.
If you’re hand-picking smaller items, you can get away with smaller aisle spaces and basic equipment, like rolling ladders.
Storage Should Be Accessible
Workers should be able to retrieve items they need in as few movements as possible.
Place high-use items separately from others in storage and keep them closest to the work areas.
This makes them more accessible for workers-plan to store a day’s worth of goods here.
You can keep other, less frequently-used items elsewhere.
Focus on Vertical Space
Measure the height of your ceilings.
You’ll want to go as high as you can vertically with racking and shelves.
Why?
Because it’s cheaper to go higher than it is to go horizontally.
Store Your Equipment
Where will you store equipment when it’s not in use?
If you’re using the same piece of equipment for multiple tasks, will it be convenient and accessible enough to minimize wasting time retrieving it?
Overall, your equipment should be both safe and easily accessible when needed for use.
Step 5: Test Your Plans
Now that you have a basic warehouse setup, you’ll want to test it to make sure it works before spending any money.
Here are a few ways you can do that:
Mark Your Elements
Lay down tape on the floors to mark key elements like spaces for equipment, tables, or shelves.
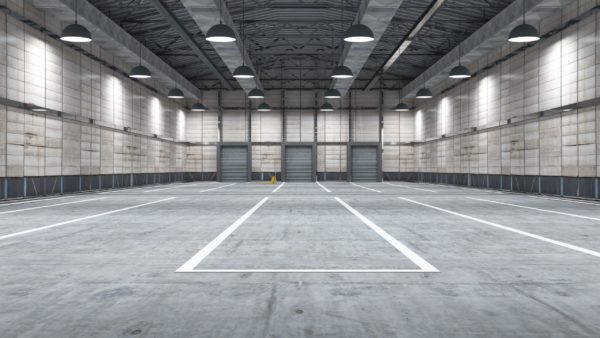
This will help you visualize their placement and determine if any changes should be made.
Double-Check Your Fixtures and Equipment
It’s easier to make corrections now than change where these are located later.
Check the layout areas that are difficult to change multiple times to make sure they’re well set up.
Involve Your Employees to Test the Warehouse Floor Plan
Your employees are the ones who understand their workflows the best.
And so they’ll be able to identify weaknesses and flaws in the warehouse layout.

If you don’t already have employees, involve your friends and family to help in role-playing warehouse functions.
Incorporate their feedback and adjust your layout as needed.
Practice Work Functions in the Warehouse
Pretend that you’re working to practice work functions in the planned layout.
Do you feel that you have enough room?
Can your equipment, like pallet jacks or forklifts, move or navigate easily throughout your layout?
Warehouse Setup Checklist
Warehouse setup is a huge undertaking.
To help you keep everything in check, here is a simple warehouse setup checklist:
Step 1: Create Your Layout
-
Get an accurate measurement of your warehouse
-
Draw the warehouse schematics. Use paper and pencil, digital software, or a warehouse design specialist to create the layout
-
Add in stationary elements/features such as office area, columns or supports, installed equipment, stairways, sloping floors, and overhead doors
Step 2: Planning Your Warehouse
-
Make sure the warehouse layout utilizes the space efficiently
-
Consider how you plan to use your warehouse. Is it for manufacturing, eCommerce, or a light product assembly operation?
-
Plan space for your warehouse equipment and other surrounding workspaces
-
Plan your stock shelving and assembly stations
-
Create workflow stations and warehouse production zones
-
Ensure you have a service zone for your equipment and a changing/restroom for your workers
Step 3: Plan Your Traffic and Workflows
-
Determine the movement needs for products/goods and workers within the warehouse
-
Determine around which “key elements” – work tables, manufacturing equipment, or storage area – that most work will center around
-
Allocate space for bins, tools, workbenches, and safety stations needed for production
-
Allocate enough aisle space between shelving units to ensure equipment and workers can move freely through the aisles
-
Allocate ample production space around assembly stations, workbenches, specialized stations, and related equipment
-
Consider how much time you and your workers will spend in various locations in the warehouse
Step 4: Consider Storage
-
Establish warehouse storage areas at appropriate locations depending on your goods and materials
-
Identify the type of warehouse storage and methods you’d like to use based on what you will store
-
How you move goods and/or materials around in your warehouse dictates aisle spacing. Will you use a pallet jack, forklift, or rolling stairs?
-
When creating your warehouse floor plan, consider your overhead spaces. Using high shelves can help you set aside your warehouse floor space for other activities if you have the space
-
Choose your warehouse storage and work area equipment carefully
Step 5: Test Your Plans
-
Mark the location of your key elements to help you visualize them
-
Double-check your fixtures and equipment
-
Involve your workers to test your warehouse floor plan and help you understand if there is enough space to conduct their activities
-
Practice work functions in the planned warehouse using employees or friends and family role play
-
Check the layout areas and double-check the hard-to-change areas to avoid having to move heavy equipment and fixtures once they’re installed
Tips for Setting Up Small Warehouses
What we’ve covered so far applies to large warehouses.
But if you have a small warehouse, you might be wondering what else you should consider to optimize the space.
Before we go into the tips, let’s first understand small warehouses.
What Is a Small Warehouse?
Typically, a small warehouse is any facility that is below 1,000 square feet.
In concept, a small or mini-warehouse is similar to consumer storage solutions.
This is where you rent only a particular space you need for the term you need it in a facility with many small storage spaces.
Businesses that benefit from small warehouses include e-commerce and startup businesses that store small parcel SKUs.
Pharmaceutical companies, retailers, service and repair organizations can all benefit from small warehouses because they can efficiently work in smaller spaces.
But, small warehouses present special challenges.
These include:
-
Congestion
-
Bumping into employees and equipment
-
Difficulty in shelving and storage due to limited space
-
Poor layout or space utilization
-
Excess inventory
If the warehouse gets too small, here are some tips that can help you manage it well:
Storage and Forward Picking: Product Velocity Matters
Obviously, the main reason you have a warehouse is storage.
Be smart about arranging your warehouse and storage area.
Make sure your order pickers don’t have to walk far for what they need from the shelves.

Remember: Every step a picker makes costs money!
Reduce the warehouse travel time using a forward pick location.
Make it easy to access high-velocity SKUs (those that are ordered more often).
Place this area close to your packing stations to minimize travel time and to maintain the flow of goods through the warehouse.
Don’t Block Your Shipping and Receiving Areas
If you have a single door, you’ll need to ensure there’s a proper workflow.
This will prevent inbound shipments from interfering with outbound shipments.
After all, your business only makes money when products go out the door.
So keep this area focused on getting products out.
You can do this by moving inbound shipments over to a staging area immediately after arrival.
Then, place these goods into storage, away from the door.
Build Around Your Work Stations
This is the main activity that warehouses are concerned about: Getting products out the door.
So, your workstations should be the central aspect of your warehouse.

Ensure that the whole process, from picking, packing/assembly, and shipping, is seamless.
Once ready for shipping, products should move to a staging area.
This is because it can more quickly go out the door and you can save on congestion.
Carefully Plan Your Traffic Flows
Small warehouses increase the chances of workers and equipment blocking or impacting one another.
To minimize this, you’ll need to work out the traffic flows from each area of your warehouse.
For example, how does material move from your receiving docks to storage?
And from there, to picking and being packed to outbound docks?
Whatever your specific workflow, traffic shouldn’t cross paths or double back on itself.
Leave Room to Grow
Many small companies are only small for a time.
Then, they grow.
So you’ll need to accommodate this growth when you plan your warehouse layout.

How do you do this?
Leave as much open space as you can afford in your layout.
You can use this space later for adding shelving, workstations, and the like.
In the meantime, you can use this space as additional working space.
Conclusion
That’s it: Your ultimate guide to planning your warehouse setup.
